


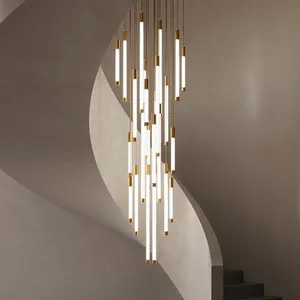


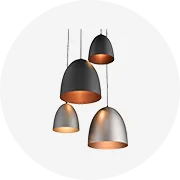
Wholesale Simple Easy Installing Led Bedroom Chandelier Restaurant Bar Creative Bean Single Head Long String Hotel Chandelier
$14.99 - $23.57
Min Order: 2 pieces
Shipping per piece: $46.10


Chandeliers, with their intricate designs and radiant light, can dramatically transform any space. Whether you're drawn to the rustic charm of antler chandeliers or the elegant shimmer of crystal ones, installing a chandelier can be a rewarding DIY project. This article will guide you through the process, from understanding the different types and styles of chandeliers, to choosing the right one for your space, and finally, to the step-by-step installation process. We'll also share some essential maintenance and cleaning tips to keep your chandelier sparkling for years to come.
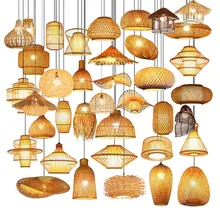
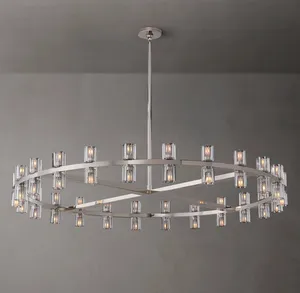
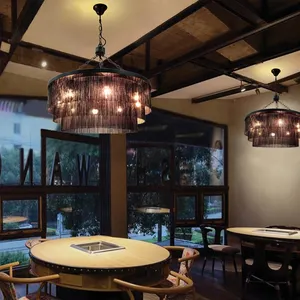
Chandeliers are versatile light fixtures that come in various styles. Candle chandeliers, with their rustic vibe, fit many decor types. Antler chandeliers, connected by antlers instead of metal, exude an outdoor feel. Crystal chandeliers, featuring crystals, scatter light elegantly, making a statement. Glass chandeliers, with their diverse shapes and styles, serve as great centerpieces. Modern chandeliers, with their futuristic style, complement modern rooms. Drum chandeliers, with their unique shape, provide even, warm light. Lastly, bowl chandeliers, less flashy than others, work best in understated settings.
Before you start installing a chandelier, it's crucial to gather the necessary tools and follow safety measures. Understand that installing a chandelier is only advisable if you're familiar with assembling light fixtures and handling electrical components. If you're inexperienced, you might risk damaging the chandelier or experiencing an electrical shock. However, if you're comfortable working with a screwdriver and electrical wires, you can proceed. Always remember to switch off the main electrical supply before starting the installation process to ensure safety.
Choosing the right chandelier for your space involves understanding the size and style that best suits your room. The size of the chandelier should be proportionate to the room and the furniture within it. The style should complement the overall decor of your space. Whether you prefer a traditional, modern, or rustic look, there's a chandelier that's perfect for you. Remember, the right chandelier can transform your space, providing not just light, but also serving as a focal point.
Choosing the correct height for your chandelier is crucial to achieving the right aesthetic and functionality. The rules of chandelier height vary by room and can be difficult to grasp. The chandelier selected will need to reflect your home’s design aesthetic. It must be the right size for the space; too small and it will look dwarfed, while a too-big chandelier can overpower a room. Remember, the height of your chandelier can significantly impact the overall look and feel of your space.
Choosing the right size for your chandelier is crucial. The diameter should be calculated by adding the length and width of the room, then converting it to inches. For instance, a 10' x 14' room would need a 24" chandelier. If it's above a table, consider the ceiling height and table size. The chandelier's diameter should be half to three quarters of the tabletop's width. For a 48" wide x 60" long table, a 24" to 36" chandelier would be suitable.
Before installing your chandelier, ensure you read the guidelines provided for your safety. It's recommended that direct wired fixtures be installed by a professional electrician. If your chandelier comes with installation instructions, follow them as this guide is for general reference. Remember, if you purchased a chandelier from Alibaba, your chandelier should have the necessary hardware included in the installation kit.
Before installing a new chandelier, it's crucial to safely remove the old light fixture. Start by turning off the power. Next, remove the light shade or bowl, unscrew the light bulbs, and take off the fixture plate to expose the wires. Live wires can be dangerous, so use a voltage detector to test any wires first. If you're not confident at any stage, it's best to contact a professional electrician.
When installing a chandelier, the bracket plays a crucial role. Attach the chandelier’s mounting bracket to the ceiling box with screws. Insert the chandelier’s hook into the bracket. Next, take the bare copper wire, which is your ground, and wrap that around the green screw on the chandelier’s mount. This process is critical for the successful installation of your chandelier. Remember, the type of ceiling and existing fixtures will determine whether you use a pancake-styled electrical box or a fan brace.
Attaching the chandelier to the ceiling is a critical part of the installation process. Start by attaching the chandelier's mounting bracket to the ceiling box using screws. Then, insert the chandelier's hook into the bracket. For the connection, take the bare copper wire, which is your ground, and wrap it around the green screw on the chandelier's mount. This process ensures a secure and safe installation of your chandelier.
When connecting the wires of your chandelier, first, connect the neutral wire from the light fixture to the neutral white wire(s) in the box. If your fixture is wired with lamp-style cord, identify the neutral wire by looking for silver conductors, squared corners, or ribs on the insulation. The unmarked wire is the hot wire. Connect it to the colored (usually black or red) hot wire in the box. Complete the hook-up by looping the ground wire clockwise around the ground screw on the crossbar, tightening the screw, and connecting the end of the ground wire to the chandelier.
After the chandelier wiring is complete and the fixture is securely attached to the ceiling, it's time to add the finishing touches. The type of bulbs you choose will determine the final ambience of your chandelier. Incandescent bulbs create a warm glow, while halogen bulbs produce clear and bright light, maximizing the sparkle of crystal or glass. LED bulbs, common in modern designs, offer a glow similar to incandescent bulbs but are more energy-efficient and long-lasting. Always check the fixture for the correct bulb wattage. Insert the light bulbs and restore the electrical power to complete the installation.
Maintaining and cleaning your chandelier is crucial to keep it sparkling. Clean it at least once a year or when it appears dull. Use white gloves or soft, lint-free cloths to avoid fingerprints. Always turn off the power before cleaning. There are two methods: 'glass on' and 'glass off'. For the 'glass on' method, use a solution of one part isopropyl alcohol to four parts distilled water. For the 'glass off' method, you can hand-wash the glass in lukewarm sudsy water. Avoid ammonia-based cleaners as they can damage the metal hooks.
Installing a chandelier can be a transformative experience for your space, infusing it with a unique blend of style and function. By understanding the different types of chandeliers, choosing the right one for your space, and following the step-by-step installation guide, you can successfully complete this DIY project. Remember, safety is paramount, and if you're unsure at any stage, it's best to consult a professional. Once installed, regular maintenance and cleaning will ensure your chandelier continues to illuminate your space beautifully. So, are you ready to transform your space with a chandelier?


 浙公网安备 33010002000092号
 浙B2-20120091-4